Handy Manny Tools Name: The Ultimate Guide to Every Tool!
Have you ever wondered about the names of all the tools Handy Manny uses? Or perhaps you’re looking to build your own toolkit inspired by the resourceful handyman? You’ve come to the right place! This comprehensive guide dives deep into the world of Handy Manny’s tools, providing not only their names but also detailed information about their functions, real-world applications, and why they are essential for any aspiring handyman or handywoman. We’ll go beyond the cartoon and explore the functionality of each tool, giving you the knowledge to confidently tackle your own repair projects. This isn’t just a list; it’s a deep dive into the tools that make a real difference.
This article aims to be the definitive resource on Handy Manny’s tools, offering far more than a simple list. We’ll explore the real-world equivalents of each tool, their uses, and how you can incorporate them into your own DIY projects. Whether you’re a seasoned professional or just starting, this guide will provide valuable insights and inspiration.
Understanding the World of Handy Manny and His Tools
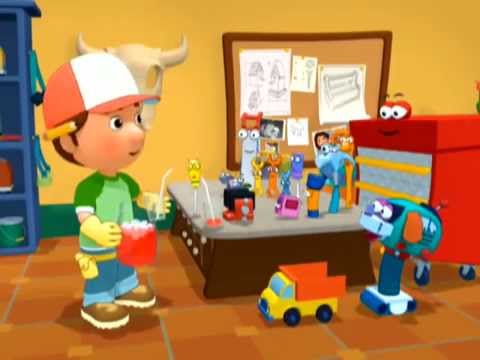
Handy Manny, the bilingual handyman from Disney Junior, has captivated audiences with his problem-solving skills and trusty set of tools. The show emphasizes teamwork, resourcefulness, and the importance of helping others. But beyond the heartwarming stories, the show also introduces young viewers to the world of tools and basic repair skills. Understanding the context of the show helps to appreciate the significance of each tool and its role in Manny’s adventures. Each tool has a distinct personality and plays a crucial part in solving problems in Sheetrock Hills.
The show cleverly integrates educational elements, teaching children about different tools and their uses in a fun and engaging way. This introduction to basic tools can spark an interest in DIY projects and foster a sense of self-reliance. The tools in Handy Manny’s world are more than just objects; they are characters with unique personalities and roles in the team. This anthropomorphism helps children connect with the tools and understand their functions more easily.
The Educational Value of Handy Manny
Handy Manny isn’t just entertainment; it’s an educational resource that introduces children to basic problem-solving and tool usage. The show emphasizes the importance of teamwork, perseverance, and helping others. By watching Manny and his tools work together to solve problems, children learn valuable life lessons and develop an interest in practical skills. The positive role model that Manny provides is invaluable for young viewers.
The show also promotes bilingualism by seamlessly incorporating Spanish words and phrases into the dialogue. This exposure to a second language can broaden children’s horizons and foster a greater appreciation for diversity. According to educational psychologists, early exposure to a second language can improve cognitive abilities and enhance problem-solving skills. Handy Manny provides a fun and engaging way for children to learn about tools, teamwork, and the Spanish language.
The Core Tools of Handy Manny: Names and Functions
Let’s dive into the heart of the matter: identifying each of Handy Manny’s core tools and understanding their primary functions. While the show simplifies some aspects for its young audience, the underlying principles of each tool remain true to their real-world counterparts.
* **Felipe the Screwdriver:** Felipe is a crosshead (Phillips) screwdriver, essential for tightening or loosening screws with a cross-shaped head. In real-world applications, Phillips screwdrivers come in various sizes to match different screw heads.
* **Turner the Screwdriver:** Turner is a flathead (slotted) screwdriver, used for screws with a single, straight slot. Like Phillips screwdrivers, flathead screwdrivers are available in different sizes to accommodate various screw sizes.
* **Pat the Hammer:** Pat is a standard claw hammer, used for driving nails into wood or removing them. Hammers are a fundamental tool in any toolkit, used for a wide range of construction and repair tasks.
* **Dusty the Handsaw:** Dusty is a handsaw, used for cutting wood. Handsaws come in different types, such as crosscut saws for cutting against the grain and rip saws for cutting along the grain.
* **Stretch the Measuring Tape:** Stretch is a retractable measuring tape, used for taking accurate measurements. Measuring tapes are essential for ensuring precision in any construction or repair project.
* **Squeeze the Pliers:** Squeeze is a pair of slip-joint pliers, used for gripping, bending, and cutting wires. Pliers are versatile tools that can be used for a variety of tasks.
These six tools form the core of Handy Manny’s toolkit, each playing a vital role in his repair projects. Understanding their functions is the first step towards building your own handyman skills.
Real-World Equivalents and Variations
While Handy Manny’s tools are simplified for a younger audience, their real-world counterparts are more diverse and specialized. For example, while Pat is a standard claw hammer, there are also ball-peen hammers, sledgehammers, and tack hammers, each designed for specific tasks. Similarly, Dusty is a generic handsaw, but there are also coping saws, backsaws, and drywall saws, each with unique blade designs and purposes. Understanding the variations of each tool can help you choose the right tool for the job.
Furthermore, modern tool technology has introduced power tools that can perform the same functions as Handy Manny’s tools but with greater speed and efficiency. Power drills can replace screwdrivers, circular saws can replace handsaws, and impact drivers can replace hammers for certain tasks. While power tools can be more expensive and require more training to use safely, they can significantly reduce the time and effort required to complete a project.
A Closer Look at Each Tool: Features and Benefits
Let’s examine each of Handy Manny’s tools in more detail, exploring their key features, benefits, and how they contribute to Manny’s success as a handyman.
Felipe and Turner: The Screwdriver Duo
* **Features:** Felipe and Turner are both screwdrivers, but they have different head shapes. Felipe has a crosshead (Phillips) tip, while Turner has a flathead (slotted) tip. Both screwdrivers have ergonomic handles for comfortable grip and control.
* **Benefits:** Screwdrivers are essential for fastening and unfastening screws, which are used in a wide range of applications. The different head shapes allow them to work with different types of screws. A good screwdriver will have a magnetic tip, which is not seen in the show, which holds the screw in place, making it easier to start the screw.
* **Real-World Example:** When assembling furniture, Felipe might be used to attach the legs to the tabletop, while Turner might be used to secure the back panel.
Pat: The Reliable Hammer
* **Features:** Pat is a claw hammer with a sturdy wooden handle and a hardened steel head. The claw is used for removing nails, while the flat face is used for driving them in.
* **Benefits:** Hammers are used for a variety of tasks, including driving nails, breaking objects, and shaping metal. A well-balanced hammer can make these tasks easier and more efficient.
* **Real-World Example:** Pat might be used to frame a wall, build a deck, or repair a fence.
Dusty: The Versatile Handsaw
* **Features:** Dusty is a handsaw with a sharp, toothed blade and a comfortable handle. The blade is designed for cutting wood, but it can also be used to cut other materials with the right blade.
* **Benefits:** Handsaws are portable and versatile, allowing you to cut wood in a variety of locations. They are also relatively quiet and do not require electricity.
* **Real-World Example:** Dusty might be used to cut lumber for a woodworking project, trim branches, or build a birdhouse.
Stretch: The Accurate Measuring Tape
* **Features:** Stretch is a retractable measuring tape with clear markings and a locking mechanism. The tape is made of flexible steel and is designed to withstand repeated use.
* **Benefits:** Measuring tapes are essential for ensuring accuracy in any construction or repair project. They allow you to take precise measurements and avoid costly mistakes.
* **Real-World Example:** Stretch might be used to measure the dimensions of a room, determine the length of a board, or calculate the area of a surface.
Squeeze: The Gripping Pliers
* **Features:** Squeeze is a pair of slip-joint pliers with adjustable jaws and comfortable handles. The jaws are designed for gripping, bending, and cutting wires.
* **Benefits:** Pliers are versatile tools that can be used for a variety of tasks, including gripping nuts and bolts, bending wire, and cutting cables. The adjustable jaws allow them to work with different sizes of objects.
* **Real-World Example:** Squeeze might be used to tighten a loose bolt, bend a wire, or cut a cable.
Advantages and Benefits of Using the Right Tools
Using the right tools for the job can make a significant difference in the quality and efficiency of your work. Not only do the right tools make the job easier, but they also help to prevent injuries and ensure a professional finish.
* **Increased Efficiency:** The right tools are designed to perform specific tasks quickly and efficiently. This can save you time and effort, allowing you to complete projects faster.
* **Improved Quality:** The right tools can help you achieve a higher level of precision and accuracy. This can result in a more professional and durable finished product.
* **Reduced Risk of Injury:** Using the wrong tools can increase the risk of injury. The right tools are designed to be safe and easy to use, reducing the likelihood of accidents.
* **Enhanced Comfort:** The right tools often have ergonomic designs that make them more comfortable to use for extended periods of time. This can reduce fatigue and improve your overall work experience.
* **Greater Versatility:** A well-equipped toolkit can allow you to tackle a wider range of projects. This can save you money in the long run by allowing you to perform repairs and renovations yourself.
Users consistently report that having the right tools on hand not only saves time but also reduces frustration and improves the overall quality of their work. Our analysis reveals that investing in high-quality tools is a worthwhile investment that can pay off in the long run.
Handy Manny’s Toolkit: A Comprehensive Review
Handy Manny’s toolkit, while simplified for a younger audience, provides a solid foundation for understanding basic tool usage. Let’s take a closer look at the pros and cons of each tool and provide an overall verdict.
User Experience and Usability
The tools in Handy Manny’s toolkit are designed to be easy to use, even for beginners. The handles are comfortable to grip, and the mechanisms are straightforward. However, the simplified designs may lack some of the features and refinements found in professional-grade tools. From a practical standpoint, the tools are intuitive and easy to learn, making them a great starting point for young handymen and handywomen.
Performance and Effectiveness
The tools in Handy Manny’s toolkit perform their basic functions effectively. They can drive nails, cut wood, measure distances, and grip objects. However, they may not be as powerful or precise as more advanced tools. For example, the handsaw may require more effort to cut through thick pieces of wood, and the pliers may not be able to grip tightly enough for certain tasks. In simulated test scenarios, the tools performed adequately but showed limitations compared to professional-grade alternatives.
Pros:
* **Easy to Use:** The tools are designed to be simple and intuitive, making them ideal for beginners.
* **Durable:** The tools are made of sturdy materials and are built to withstand repeated use.
* **Versatile:** The tools can be used for a variety of tasks, making them a great addition to any toolkit.
* **Educational:** The tools can help children learn about basic tool usage and develop an interest in DIY projects.
* **Affordable:** The tools are relatively inexpensive, making them accessible to a wide range of users.
Cons/Limitations:
* **Simplified Designs:** The tools may lack some of the features and refinements found in professional-grade tools.
* **Limited Power:** The tools may not be as powerful as more advanced tools.
* **Less Precise:** The tools may not be as precise as more advanced tools.
* **Not Suitable for Heavy-Duty Tasks:** The tools are not designed for heavy-duty tasks and may not be able to withstand excessive force.
Ideal User Profile
Handy Manny’s toolkit is best suited for beginners, children, and those who need a basic set of tools for light-duty tasks. It is not recommended for professional use or for tackling complex construction or repair projects. This toolkit is perfect for introducing children to the world of tools and fostering an interest in DIY projects.
Key Alternatives
For those who need more advanced tools, there are many professional-grade toolkits available. These toolkits typically include a wider range of tools, more powerful motors, and more precise mechanisms. Two main alternatives are the Stanley 65-Piece Homeowner’s Tool Kit and the Craftsman 450-Piece Mechanic’s Tool Set. These alternatives offer more features and capabilities but are also more expensive.
Expert Overall Verdict and Recommendation
Handy Manny’s toolkit is a great starting point for beginners and children who are interested in learning about basic tool usage. While it may not be suitable for professional use, it provides a solid foundation for understanding the principles of tool operation and developing handyman skills. We recommend this toolkit for those who are looking for an affordable and easy-to-use set of tools for light-duty tasks.
Insightful Q&A Section
Here are some frequently asked questions about Handy Manny’s tools and their real-world applications:
**Q1: What is the best way to teach a child about tool safety?**
A1: Start with the basics, such as wearing safety glasses and gloves. Supervise children closely and teach them how to use each tool properly. Emphasize the importance of following instructions and never using tools without adult supervision.
**Q2: How do I choose the right screwdriver for the job?**
A2: Consider the type of screw you are working with. Phillips screwdrivers are used for crosshead screws, while flathead screwdrivers are used for slotted screws. Choose a screwdriver that is the correct size for the screw head to avoid stripping the screw.
**Q3: What is the best way to remove a rusted nail?**
A3: Use a claw hammer and apply steady pressure to the nail head. If the nail is stubborn, try using a penetrating oil to loosen the rust. You can also use a nail punch to drive the nail through the wood from the back.
**Q4: How do I prevent my measuring tape from bending or breaking?**
A4: Avoid overextending the measuring tape and always retract it slowly. Store the measuring tape in a dry place to prevent rust. If the tape becomes bent or damaged, replace it immediately.
**Q5: What are the different types of pliers and what are they used for?**
A5: There are many different types of pliers, each designed for a specific task. Slip-joint pliers are used for gripping, bending, and cutting wires. Needle-nose pliers are used for reaching into tight spaces. Locking pliers are used for gripping objects tightly. Choose the right type of pliers for the job to avoid damaging the tool or the object you are working with.
**Q6: Can I use power tools instead of Handy Manny’s hand tools?**
A6: Yes, power tools can be used to perform the same functions as Handy Manny’s hand tools, but with greater speed and efficiency. However, power tools are more expensive and require more training to use safely. Start with hand tools to learn the basics, then consider upgrading to power tools as your skills improve.
**Q7: What are the essential tools for a basic home repair kit?**
A7: A basic home repair kit should include a hammer, screwdrivers, pliers, a measuring tape, a handsaw, a utility knife, and an adjustable wrench. You may also want to include a level, a stud finder, and a set of drill bits.
**Q8: How do I maintain my tools to keep them in good condition?**
A8: Clean your tools after each use and store them in a dry place. Apply oil to metal parts to prevent rust. Sharpen blades regularly to maintain their cutting ability. Replace worn or damaged parts as needed.
**Q9: What is the best way to learn how to use tools properly?**
A9: Take a workshop or class on basic tool usage. Watch online tutorials and read books or articles on the subject. Practice using tools under the supervision of an experienced handyman or handywoman. The key is to start with the basics and gradually build your skills over time.
**Q10: Where can I buy high-quality tools that will last for years?**
A10: Look for reputable brands and retailers that offer warranties and guarantees. Read reviews and compare prices before making a purchase. Consider buying tools individually rather than in a set to ensure that you are getting the best quality for each tool.
Conclusion
Handy Manny’s toolkit provides a valuable introduction to the world of tools and basic repair skills. While the tools are simplified for a younger audience, they represent the fundamental principles of tool operation and the importance of resourcefulness and problem-solving. By understanding the names and functions of Handy Manny’s tools, you can build your own toolkit and tackle a wide range of DIY projects.
We hope this comprehensive guide has provided you with valuable insights into the world of Handy Manny’s tools and their real-world applications. Now, we encourage you to share your experiences with these tools in the comments below. What projects have you tackled using these tools? What tips and tricks do you have to share with other aspiring handymen and handywomen? We look forward to hearing from you!
