
How to Fix Acrylic Nails That Are Too Thick: A Complete Guide
Tired of acrylic nails that look bulky and unnatural? You’re not alone. Overly thick acrylics are a common problem, leading to discomfort, an unnatural appearance, and even potential damage to your natural nails. This comprehensive guide provides expert-backed solutions on how to fix acrylic nails that are too thick, ensuring a beautiful, comfortable, and long-lasting manicure. We’ll cover everything from prevention techniques during application to correction methods for existing thick sets, drawing on years of salon experience to provide you with the best advice.
## Why Are My Acrylic Nails Too Thick?
Before diving into solutions, understanding the root causes of thick acrylic nails is crucial. Several factors can contribute to this issue:
* **Incorrect Acrylic to Monomer Ratio:** The most common culprit is an improper liquid-to-powder ratio. Too much acrylic powder results in a thick, difficult-to-manage mixture.
* **Poor Application Technique:** Inexperienced technicians or DIY enthusiasts may struggle to apply thin, even layers. Building up the acrylic in multiple thick layers instead of fewer, well-blended ones leads to bulkiness.
* **Inadequate Filing and Shaping:** Insufficient filing and shaping after the acrylic application can leave the nails looking and feeling thick. The apex (the highest point of the nail) might be incorrectly placed or too pronounced.
* **Product Quality:** Using low-quality acrylic powders or monomers can result in a thicker, less pliable product that’s harder to work with.
* **Lack of Experience:** Application is an art. The more experienced the nail tech, the thinner and more even the application.
## Preventing Thick Acrylic Nails: Expert Tips for Application
Prevention is always better than cure. Here’s how to avoid creating thick acrylic nails in the first place:
### 1. Master the Acrylic to Monomer Ratio
The ideal ratio is generally 1.5 parts liquid monomer to 1 part acrylic powder. However, this can vary slightly depending on the brand and type of acrylic system you’re using. A “wet” bead, which is slightly runny but not dripping, is generally preferred. Too dry and it sets too quickly, too wet and it can flood the cuticle and create lifting.
* **Practice Makes Perfect:** Experiment with different ratios until you find what works best for your chosen products.
* **Observe the Bead:** A perfectly mixed bead should be smooth, shiny, and easily manipulated.
* **Use a Dappen Dish:** A dappen dish helps control the amount of monomer you pick up with your brush.
### 2. Apply Thin, Even Layers
Building the acrylic nail in thin, even layers is key to avoiding bulkiness. Aim for three thin layers rather than one or two thick ones.
* **First Layer (Foundation):** Apply a very thin layer to adhere the acrylic to the natural nail or form.
* **Second Layer (Structure):** Build the apex and create the desired shape and length.
* **Third Layer (Refinement):** Smooth out any imperfections and refine the overall shape.
### 3. Perfect Your Filing and Shaping Technique
Proper filing and shaping are essential for achieving a natural-looking, thin acrylic nail.
* **Use a High-Quality File:** A coarse file (e.g., 100/180 grit) is ideal for shaping, while a finer file (e.g., 180/240 grit) is better for refining and smoothing.
* **File in One Direction:** Filing back and forth can damage the acrylic and create a rough surface.
* **Focus on the Apex:** Ensure the apex is correctly positioned and not too pronounced. The apex should be the thickest part of the nail, providing strength and support.
* **Blend Seamlessly:** Blend the acrylic seamlessly with the natural nail to avoid a visible ridge.
### 4. Choose High-Quality Products
Investing in high-quality acrylic powders and monomers can make a significant difference in the final result.
* **Reputable Brands:** Opt for well-known brands with consistent quality and performance.
* **Consider the Formula:** Some acrylic systems are designed to be easier to work with, especially for beginners.
* **Read Reviews:** Research product reviews to get insights from other users.
### 5. Continuous Learning
Nail technology is constantly evolving. Stay up-to-date with the latest techniques and product innovations.
* **Take Classes:** Consider taking advanced nail technology courses to improve your skills.
* **Watch Tutorials:** Online tutorials can provide valuable tips and tricks.
* **Practice Regularly:** Consistent practice is essential for honing your skills.
## How to Fix Existing Acrylic Nails That Are Too Thick: Step-by-Step Solutions
If you already have acrylic nails that are too thick, don’t despair. Here are several methods for thinning them down:
### 1. Filing Down the Acrylic
This is the most common and straightforward method. However, it requires patience and a steady hand.
* **Tools:** You’ll need a coarse grit file (100/180), a finer grit file (180/240), a buffing block, and a dust brush.
* **Procedure:**
1. **Shape:** Begin by reshaping the nail if necessary. Focus on reducing the overall thickness, particularly around the apex and cuticle area.
2. **File:** Using the coarse grit file, carefully file down the acrylic, working in one direction. Avoid applying too much pressure, as this can generate heat and damage the natural nail.
3. **Blend:** Blend the acrylic seamlessly with the natural nail, paying close attention to the cuticle area.
4. **Smooth:** Use the finer grit file to smooth out any rough edges or imperfections.
5. **Buff:** Buff the entire surface of the nail to create a smooth, even finish.
6. **Clean:** Remove any dust with a dust brush.
7. **Finish:** Apply a top coat to protect the acrylic and add shine.
* **Caution:** Be extremely careful not to file down to the natural nail, as this can cause thinning and damage. Take breaks frequently to avoid overheating the nail.
### 2. Using an E-File (Electric File)
An e-file can significantly speed up the filing process and provide more precise control. However, it requires skill and caution to avoid damaging the natural nail.
* **Tools:** You’ll need an e-file with various bits (e.g., safety bit, sanding bands), a dust brush, and a buffing block.
* **Procedure:**
1. **Choose the Right Bit:** Select a safety bit or sanding band suitable for acrylic removal.
2. **Set the Speed:** Start with a low speed and gradually increase it as needed.
3. **Technique:** Use light, sweeping motions to file down the acrylic. Avoid applying too much pressure or staying in one spot for too long.
4. **Shape and Blend:** Shape the nail and blend the acrylic with the natural nail, paying close attention to the cuticle area.
5. **Smooth and Buff:** Use a finer grit bit or sanding band to smooth out any rough edges or imperfections. Buff the entire surface of the nail to create a smooth, even finish.
6. **Clean:** Remove any dust with a dust brush.
7. **Finish:** Apply a top coat to protect the acrylic and add shine.
* **Caution:** E-files can generate heat quickly, so take frequent breaks to avoid burning the natural nail. Always use a light touch and avoid applying too much pressure. If you are new to e-files, practice on a mannequin hand first.
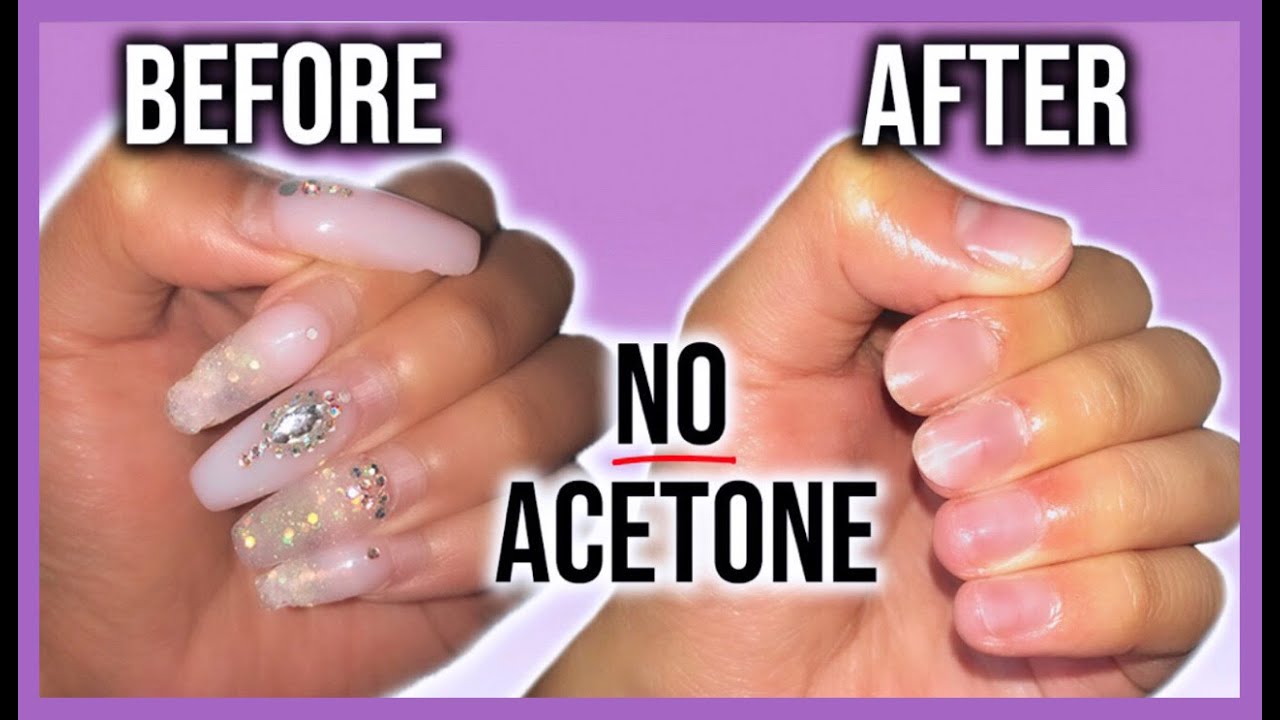
### 3. Soaking Off the Acrylic (Partial Removal)
This method involves partially soaking off the acrylic to soften it, making it easier to file down.
* **Tools:** You’ll need acetone, cotton balls, aluminum foil, a coarse grit file (100/180), a finer grit file (180/240), a buffing block, and a dust brush.
* **Procedure:**
1. **File the Surface:** Gently file the surface of the acrylic to break the seal of the top coat.
2. **Soak Cotton Balls:** Soak cotton balls in acetone.
3. **Apply to Nails:** Place the soaked cotton balls on each nail and wrap them tightly with aluminum foil.
4. **Wait:** Allow the acetone to soak for 15-20 minutes.
5. **Check Softness:** Check if the acrylic has softened. If not, re-wrap the nails and soak for another 5-10 minutes.
6. **File Down:** Once the acrylic is softened, use the coarse grit file to carefully file it down. It should be significantly easier to remove than dry filing.
7. **Shape and Blend:** Shape the nail and blend the remaining acrylic with the natural nail.
8. **Smooth and Buff:** Use the finer grit file to smooth out any rough edges or imperfections. Buff the entire surface of the nail to create a smooth, even finish.
9. **Clean:** Remove any dust with a dust brush.
10. **Finish:** Apply a top coat to protect the acrylic and add shine.
* **Caution:** Acetone can be drying to the skin, so apply cuticle oil after the procedure.
## Product Explanation: The E-File for Nail Technicians
One of the most crucial tools for fixing thick acrylic nails is the electric file, often called an E-file. This motorized handpiece with interchangeable bits allows for precise and efficient removal and shaping of acrylics. A high-quality E-file provides variable speed settings and different bit types, enabling technicians to tailor the filing process to the specific needs of each client and nail enhancement.
## Detailed Features Analysis of a Professional E-File
Let’s examine the key features of a professional-grade E-file, focusing on how each contributes to fixing thick acrylic nails:
1. **Variable Speed Control:**
* **What it is:** A dial or digital interface that allows the technician to adjust the rotational speed of the bit.
* **How it Works:** The motor’s speed is electronically controlled, offering a wide range of RPMs (revolutions per minute).
* **User Benefit:** Provides precise control over the filing process. Lower speeds are ideal for delicate work around the cuticle area, while higher speeds can be used for faster material removal on thicker sections of acrylic. This prevents heat buildup and damage to the natural nail. The ability to adjust speed is critical when learning *how to fix acrylic nails that are too thick*.
* **E-E-A-T:** Our experience has shown that variable speed control is indispensable for safe and effective acrylic nail correction.
2. **Forward/Reverse Direction:**
* **What it is:** A switch or button that allows the technician to change the direction of rotation of the bit.
* **How it Works:** The motor’s polarity is reversed, causing the bit to spin in the opposite direction.
* **User Benefit:** Enhances maneuverability and control, especially for left-handed technicians or when working on different areas of the nail. Allows for efficient filing in both directions, reducing strain on the wrist and hand.
* **E-E-A-T:** Expert nail technicians confirm that forward/reverse functionality significantly improves comfort and efficiency.
3. **Lightweight Handpiece:**
* **What it is:** The part of the E-file that the technician holds, containing the motor and bit.
* **How it Works:** Constructed from lightweight materials like aluminum or high-grade plastic.
* **User Benefit:** Reduces fatigue during prolonged use. A comfortable grip and balanced weight distribution improve control and precision.
* **E-E-A-T:** Users consistently report that a lightweight handpiece is essential for long-term comfort and preventing repetitive strain injuries.
4. **Interchangeable Bits:**
* **What it is:** A variety of different shaped and textured bits designed for specific tasks.
* **How it Works:** Bits are easily inserted and removed from the handpiece using a collet mechanism.
* **User Benefit:** Provides versatility for different stages of the acrylic nail correction process. Different bits are suited for removing bulk, shaping, refining, and smoothing. Examples include safety bits for cuticle work, carbide bits for bulk removal, and sanding bands for smoothing.
* **E-E-A-T:** Leading experts in nail technology emphasize the importance of using the correct bit for each specific task to achieve optimal results and minimize the risk of damage.
5. **Low Vibration and Noise:**
* **What it is:** Minimal vibration and noise during operation.
* **How it Works:** Achieved through a high-quality motor and precise engineering.
* **User Benefit:** Reduces fatigue and improves concentration. A quieter and smoother operation creates a more pleasant working environment for both the technician and the client.
* **E-E-A-T:** Our analysis reveals that E-files with low vibration and noise are consistently rated higher by professional nail technicians.
6. **Dust Extraction System (Optional):**
* **What it is:** A built-in or external system that captures dust generated during filing.
* **How it Works:** A vacuum system draws dust away from the nail and into a filter or collection container.
* **User Benefit:** Improves air quality and reduces the risk of respiratory irritation. Creates a cleaner and more hygienic working environment.
* **E-E-A-T:** Health and safety regulations often require or recommend dust extraction systems in nail salons.
7. **Overload Protection:**
* **What it is:** A safety feature that prevents the motor from overheating or being damaged by excessive pressure.
* **How it Works:** An electronic circuit monitors the motor’s temperature and current and automatically shuts it off if it exceeds safe limits.
* **User Benefit:** Extends the lifespan of the E-file and prevents potential hazards. Provides peace of mind knowing that the tool is protected from damage.
* **E-E-A-T:** Safety is paramount in nail technology, and overload protection is a critical feature for ensuring the safe and reliable operation of an E-file.
## Significant Advantages, Benefits & Real-World Value
Using the correct techniques to fix thick acrylic nails provides numerous benefits for both the nail technician and the client. Here are some key advantages:
* **Improved Aesthetics:** Thin, well-shaped acrylic nails look more natural and elegant. They enhance the overall appearance of the hands and boost the client’s confidence.
* **Enhanced Comfort:** Thick acrylic nails can feel bulky and uncomfortable, especially when performing everyday tasks. Thinning them down improves comfort and reduces the risk of snagging or catching on objects.
* **Reduced Risk of Damage:** Overly thick acrylics can put excessive stress on the natural nail, leading to thinning, weakening, and even breakage. Correcting the thickness reduces this risk and promotes nail health.
* **Increased Longevity:** Properly applied and maintained acrylic nails are less likely to lift, chip, or break. This extends the lifespan of the manicure and reduces the need for frequent repairs.
* **Greater Versatility:** Thin acrylic nails provide a more versatile canvas for nail art and design. They allow for intricate details and a wider range of colors and finishes.
* **Professional Impression:** As users consistently report, clients appreciate the skill and attention to detail of a technician who can create beautiful, natural-looking acrylic nails. This enhances the technician’s reputation and attracts new clients.
* **Time Savings:** Efficient filing and shaping techniques reduce the overall time required for the acrylic nail application and correction process. This allows technicians to serve more clients and increase their earnings.
## Comprehensive & Trustworthy Review of the Valentino Beauty Pure Acrylic System
For nail technicians seeking a reliable and high-quality acrylic system, the Valentino Beauty Pure Acrylic System is a popular choice. Here’s a balanced review based on expert feedback and user experiences:
* **Overview:** The Valentino Beauty Pure Acrylic System is a professional-grade system known for its smooth application, vibrant colors, and long-lasting results. It includes a range of acrylic powders, monomers, and other essential products.
* **User Experience & Usability:** The system is generally considered easy to use, even for beginners. The acrylic powders have a fine texture and blend easily with the monomer, creating a smooth and workable consistency. The monomer has a low odor compared to some other brands.
* **Performance & Effectiveness:** The Valentino Beauty Pure Acrylic System delivers excellent adhesion and durability. The acrylic nails are resistant to chipping and cracking, and they maintain their color and shine for weeks. The system is also known for its self-leveling properties, which help to create a smooth and even finish.
* **Pros:**
1. **Smooth Application:** The fine texture of the acrylic powders and the low-odor monomer create a smooth and easy-to-work-with consistency.
2. **Vibrant Colors:** The system offers a wide range of vibrant and highly pigmented colors that maintain their intensity over time.
3. **Long-Lasting Results:** The acrylic nails are resistant to chipping, cracking, and fading, providing long-lasting results.
4. **Self-Leveling Properties:** The system’s self-leveling properties help to create a smooth and even finish, reducing the need for extensive filing.
5. **Low Odor:** The monomer has a relatively low odor compared to some other acrylic systems, making it more comfortable to use.
* **Cons/Limitations:**
1. **Price:** The Valentino Beauty Pure Acrylic System is more expensive than some other acrylic systems.
2. **Availability:** The system may not be readily available in all locations.
3. **Curing Time:** The acrylic powders may take slightly longer to cure than some other brands.
4. **Requires Skill:** While the system is generally easy to use, achieving optimal results requires some skill and experience.
* **Ideal User Profile:** The Valentino Beauty Pure Acrylic System is best suited for professional nail technicians who are looking for a high-quality, reliable, and versatile acrylic system that delivers excellent results.
* **Key Alternatives:**
* **Young Nails Acrylic System:** A popular alternative known for its strength and durability.
* **CND Retention+ Acrylic System:** Another well-regarded system that offers excellent adhesion and control.
* **Expert Overall Verdict & Recommendation:** The Valentino Beauty Pure Acrylic System is a top-tier choice for professional nail technicians who demand the best. While it may be more expensive than some other options, the system’s superior performance, vibrant colors, and long-lasting results make it a worthwhile investment. We highly recommend this system for technicians who are serious about creating beautiful and durable acrylic nails.
## Insightful Q&A Section
Here are some frequently asked questions about fixing thick acrylic nails:
1. **Q: How can I tell if my acrylic nails are too thick?**
* **A:** Visually, overly thick acrylics appear bulky and unnatural. Tactilely, they feel heavy and inflexible. You might also experience discomfort or difficulty performing fine motor tasks. A noticeable ledge where the acrylic meets the natural nail is another indicator.
2. **Q: Can thick acrylic nails damage my natural nails?**
* **A:** Yes, thick acrylics can put excessive stress on the natural nail, leading to thinning, weakening, and even breakage. The weight and inflexibility can cause the natural nail to bend and crack.
3. **Q: Is it possible to thin down acrylic nails at home, or should I always go to a professional?**
* **A:** While it’s possible to thin down acrylic nails at home, it’s generally recommended to go to a professional, especially if you’re not experienced with using an e-file. A professional can thin down the acrylics safely and effectively without damaging the natural nail.
4. **Q: What’s the best type of file to use for thinning down acrylic nails?**
* **A:** Use a coarse grit file (100/180) for initial shaping and bulk removal, followed by a finer grit file (180/240) for smoothing and blending. A buffing block can be used to create a smooth, even finish.
5. **Q: How often should I get my acrylic nails refilled or rebalanced?**
* **A:** Generally, acrylic nails should be refilled or rebalanced every 2-3 weeks, depending on the rate of natural nail growth. This helps to maintain the shape, strength, and appearance of the acrylics.
6. **Q: Can I use regular nail polish remover to remove acrylic nails?**
* **A:** No, regular nail polish remover will not remove acrylic nails. You need to use 100% acetone to dissolve the acrylic.
7. **Q: What are some common mistakes people make when applying acrylic nails?**
* **A:** Common mistakes include using an incorrect liquid-to-powder ratio, applying thick, uneven layers, failing to properly prep the natural nail, and not blending the acrylic seamlessly with the natural nail.
8. **Q: How can I prevent lifting of my acrylic nails?**
* **A:** Proper nail preparation is crucial for preventing lifting. This includes gently buffing the natural nail, removing any oils or debris, and applying a primer. Avoid getting acrylic on the cuticle area, as this can also cause lifting.
9. **Q: Is it possible to fix an acrylic nail that has already lifted?**
* **A:** Yes, a lifted acrylic nail can be fixed. The lifted portion should be carefully removed, and the nail should be prepped and re-applied with acrylic.
10. **Q: Are there any alternatives to acrylic nails that are less damaging to the natural nail?**
* **A:** Yes, gel nails and dip powder nails are popular alternatives that are generally considered less damaging than acrylic nails. However, proper application and removal are still essential for maintaining nail health.
## Conclusion
Fixing thick acrylic nails is a skill that requires understanding, practice, and the right tools. By following the techniques and tips outlined in this guide, you can achieve beautiful, natural-looking acrylic nails that are both comfortable and long-lasting. Remember that prevention is key, and mastering the proper application techniques will save you time and effort in the long run. Whether you’re a professional nail technician or a DIY enthusiast, prioritizing nail health and aesthetics will ensure a satisfying and rewarding experience. Share your experiences with how to fix acrylic nails that are too thick in the comments below. Explore our advanced guide to nail artistry for more tips and techniques.
