## How to Do Home Acrylic Nails: A Comprehensive Guide to Salon-Quality Results
Dreaming of flawless, long-lasting nails without the salon price tag? You’re not alone. Many are now exploring **how to do home acrylic nails**, and this comprehensive guide is your go-to resource. We’ll walk you through every step, from prepping your nails to achieving a professional-looking finish. Forget expensive appointments; with the right tools, techniques, and a little patience, you can master the art of **how to do home acrylic nails** and achieve stunning results from the comfort of your own home. This guide provides unparalleled detail, covering essential techniques, product selection, troubleshooting common issues, and ensuring nail health. Get ready to unlock salon-worthy nails at home!
### Why DIY Acrylic Nails?
Doing your own acrylic nails offers several advantages: it’s cost-effective, convenient, and allows for creative control. You can customize your nail shape, length, and design to perfectly match your personal style. Plus, the satisfaction of creating a beautiful set of nails yourself is incredibly rewarding. However, it’s crucial to approach the process with knowledge and care to avoid damaging your natural nails. This guide emphasizes safe practices and expert tips to ensure a successful and healthy DIY experience.
## Understanding Acrylic Nails: A Deep Dive
Acrylic nails are artificial enhancements made from a combination of a liquid monomer and a powder polymer. When mixed, these two components create a pliable substance that can be molded onto the natural nail to add length, strength, and shape. The mixture then hardens, creating a durable and long-lasting extension.
### The History of Acrylic Nails
While the exact origin is debated, acrylic nails gained popularity in the mid-20th century as a solution for repairing broken nails. Dentists, familiar with acrylic polymers used in dental work, are often credited with pioneering the technique. Over time, the process evolved, leading to the wide range of acrylic nail products and techniques available today.
### Core Concepts: Monomer and Polymer
The foundation of acrylic nails lies in the chemical reaction between the liquid monomer and the powder polymer. The monomer, typically ethyl methacrylate (EMA), acts as a binding agent. The polymer, usually polymethyl methacrylate (PMMA), provides the structure and strength. The ratio of monomer to polymer is crucial for achieving the correct consistency and preventing issues like lifting or cracking. Experimentation and experience will help you determine the ideal ratio for your preferred brand of products.
### Importance and Current Relevance
Acrylic nails remain a popular choice for those seeking durable and customizable nail enhancements. The continuous innovation in acrylic nail products and techniques allows for endless design possibilities. Recent trends, such as ombre acrylics, sculpted nails, and intricate nail art, demonstrate the enduring appeal and versatility of acrylic nails. Moreover, the rise of DIY nail art has made learning **how to do home acrylic nails** more accessible than ever before.
## Essential Tools and Materials for Home Acrylic Nails
Before you start learning **how to do home acrylic nails**, gather all the necessary tools and materials. Investing in quality products will significantly impact the outcome and longevity of your acrylic nails. Here’s a comprehensive list:
* **Acrylic Powder:** Available in various colors, clear, white, and pink are the most common for creating a natural look or a base for nail art.
* **Acrylic Liquid Monomer:** Choose a reputable brand to ensure proper curing and adhesion. EMA-based monomers are generally considered safer than MMA-based monomers.
* **Acrylic Nail Brush:** A high-quality brush with natural bristles is essential for picking up the acrylic mixture and applying it smoothly to the nail.
* **Nail Tips:** Select the desired shape and length. Options include stiletto, coffin, square, and round.
* **Nail Glue:** Use a strong, fast-drying nail glue to adhere the tips securely to your natural nails.
* **Nail File (100/180 grit):** For shaping and refining the acrylic nails.
* **Nail Buffer:** To smooth the surface of the acrylic and prepare it for polish or nail art.
* **Cuticle Pusher:** To gently push back the cuticles and create a clean nail bed.
* **Cuticle Oil:** To nourish and hydrate the cuticles after the acrylic application.
* **Primer:** To improve adhesion and prevent lifting. Acid-free primers are generally recommended.
* **Dappen Dish:** A small glass or ceramic dish to hold the acrylic liquid monomer.
* **Dust Brush:** To remove dust and debris during the filing and shaping process.
* **Lint-Free Wipes:** To clean the nails and tools.
* **Nail Dehydrator:** To remove excess oil and moisture from the nail surface.
* **Top Coat:** To seal and protect the acrylic nails.
* **Optional: Nail Drill:** Speeds up the filing and shaping process.
### Product/Service Explanation: Mia Secret Acrylic System
Mia Secret is a well-regarded brand in the nail industry, known for its high-quality acrylic systems. Their products are widely used by both professional nail technicians and DIY enthusiasts. The Mia Secret acrylic system consists of acrylic powders, liquid monomers, primers, and other essential nail products. Their popularity stems from the ease of use, durability, and consistent results provided by their products. Mia Secret aims to empower nail artists with the tools they need to create beautiful and long-lasting nail enhancements.
## Step-by-Step Guide: How to Do Home Acrylic Nails Like a Pro
Now, let’s dive into the step-by-step process of **how to do home acrylic nails**. Follow these instructions carefully to achieve professional-looking results.
### 1. Prepare Your Natural Nails
Proper preparation is crucial for the adhesion and longevity of your acrylic nails. Start by washing your hands with soap and water. Gently push back your cuticles using a cuticle pusher. Buff the surface of your natural nails to remove the shine. Use a nail dehydrator to remove any excess oil or moisture. Lightly file the natural nail to create a slightly rough surface for better adhesion.
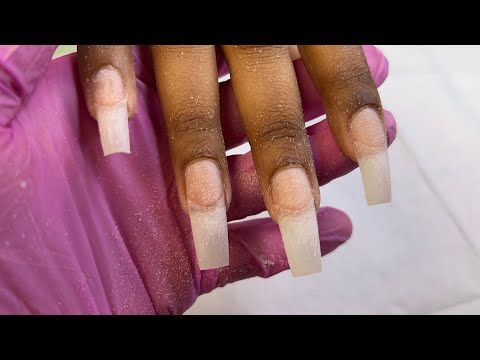
### 2. Apply Nail Tips
Select the appropriate nail tip size for each finger. Apply a small amount of nail glue to the well of the tip and press it firmly onto your natural nail, holding it in place for a few seconds until the glue dries. Trim the tips to your desired length using nail clippers. Blend the tip into your natural nail using a nail file. Be careful not to file your natural nail too thin.
### 3. Apply Primer
Apply a thin coat of primer to your natural nails and the blended nail tips. Allow the primer to dry completely before proceeding. Primer helps to improve adhesion and prevent lifting.
### 4. Mix Acrylic Powder and Liquid
Pour a small amount of acrylic liquid monomer into a dappen dish. Dip your acrylic nail brush into the liquid, then gently tap it onto the acrylic powder to pick up a small bead of acrylic. The consistency of the bead should be slightly wet but not runny. Experiment to find the perfect ratio for your chosen products. Wipe off excess monomer on the side of the dappen dish.
### 5. Apply Acrylic to the Nail
Apply the acrylic bead to the area where the nail tip meets your natural nail. Gently pat and shape the acrylic, blending it seamlessly onto the natural nail and the tip. Work quickly, as the acrylic will start to harden. Apply additional beads of acrylic as needed to create the desired thickness and shape. Ensure that the acrylic is evenly distributed and that there are no gaps or bumps.
### 6. Shape and Refine
Once the acrylic has hardened, use a nail file to shape and refine the nails. File the sides, free edge, and surface of the nails to create a smooth and even finish. Use a nail buffer to further smooth the surface and remove any scratches. Remove dust and debris with a dust brush.
### 7. Apply Top Coat
Apply a thin coat of top coat to seal and protect the acrylic nails. Allow the top coat to dry completely. Apply a second coat for added shine and durability.
### 8. Hydrate and Nourish
Apply cuticle oil to your cuticles to hydrate and nourish them. Massage the oil into the cuticles to promote healthy nail growth.
## Detailed Features Analysis of Mia Secret Acrylic System
The Mia Secret Acrylic System offers several key features that contribute to its popularity and effectiveness.
### 1. Superior Adhesion
* **What it is:** The Mia Secret monomer is formulated to create a strong bond with the natural nail and acrylic powder.
* **How it works:** The chemical composition of the monomer allows it to penetrate the nail plate and create a secure anchor for the acrylic.
* **User Benefit:** Prevents lifting and chipping, ensuring long-lasting acrylic nails.
* **Demonstrates Quality:** The superior adhesion reduces the risk of bacterial or fungal infections by preventing moisture from getting trapped between the acrylic and the natural nail.
### 2. Self-Leveling Formula
* **What it is:** The acrylic powder and monomer blend seamlessly together, creating a smooth and even surface.
* **How it works:** The self-leveling properties of the formula allow it to flow easily and fill in any imperfections.
* **User Benefit:** Reduces the need for extensive filing and shaping, saving time and effort.
* **Demonstrates Quality:** Minimizes the risk of creating uneven or bulky acrylic nails, resulting in a more natural-looking finish.
### 3. Non-Yellowing Formula
* **What it is:** The Mia Secret acrylic powder is formulated to resist yellowing over time.
* **How it works:** The inclusion of UV inhibitors in the formula prevents discoloration caused by exposure to sunlight or artificial light.
* **User Benefit:** Maintains the clarity and vibrancy of the acrylic nails for an extended period.
* **Demonstrates Quality:** Ensures that the acrylic nails retain their original color and appearance, enhancing their overall aesthetic appeal.
### 4. Wide Range of Colors
* **What it is:** Mia Secret offers a diverse selection of acrylic powder colors to suit various preferences and styles.
* **How it works:** The extensive color range allows for endless creative possibilities, from classic French manicures to intricate nail art designs.
* **User Benefit:** Enables users to customize their acrylic nails to match their individual personality and fashion sense.
* **Demonstrates Quality:** Provides users with the freedom to express their creativity and achieve unique and personalized nail looks.
### 5. Durable and Long-Lasting
* **What it is:** The Mia Secret acrylic system is designed to create strong and resilient acrylic nails that can withstand daily wear and tear.
* **How it works:** The combination of high-quality ingredients and a precise application technique results in a durable and long-lasting finish.
* **User Benefit:** Reduces the need for frequent touch-ups or repairs, saving time and money.
* **Demonstrates Quality:** Ensures that the acrylic nails maintain their integrity and appearance for an extended period, providing users with a reliable and long-lasting nail enhancement solution.
### 6. Easy to Use
* **What it is:** The Mia Secret acrylic system is relatively easy to use, even for beginners.
* **How it works:** The products are designed to be user-friendly and provide consistent results.
* **User Benefit:** Allows users to create professional-looking acrylic nails at home, without the need for extensive training or experience.
* **Demonstrates Quality:** Makes the acrylic system accessible to a wide range of users, from beginners to experienced nail technicians.
### 7. Versatile Application
* **What it is:** The Mia Secret acrylic system can be used for a variety of nail enhancements, including sculpted nails, overlays, and fills.
* **How it works:** The flexibility of the system allows users to create different nail shapes, lengths, and designs.
* **User Benefit:** Provides users with the freedom to experiment and create unique and personalized nail looks.
* **Demonstrates Quality:** Offers a versatile and adaptable solution for a wide range of nail enhancement needs.
## Significant Advantages, Benefits & Real-World Value of DIY Acrylic Nails
Choosing to learn **how to do home acrylic nails** offers a multitude of advantages, benefits, and real-world value.
### Cost Savings
One of the most significant advantages is the cost savings. Regular salon visits for acrylic nails can be expensive. By learning **how to do home acrylic nails**, you can significantly reduce your expenses. While the initial investment in tools and materials may seem substantial, it will quickly pay for itself over time.
### Convenience
DIY acrylic nails offer unparalleled convenience. You can do your nails whenever you have the time, without having to schedule appointments or travel to a salon. This is particularly beneficial for those with busy schedules or limited access to nail salons.
### Customization
DIY acrylic nails allow for complete customization. You have the freedom to choose your preferred nail shape, length, color, and design. This level of control is often not available at nail salons, where you may be limited by the available options.
### Creative Expression
Doing your own acrylic nails provides an outlet for creative expression. You can experiment with different nail art techniques, colors, and designs to create unique and personalized looks. This can be a fun and rewarding hobby.
### Learning a New Skill
Learning **how to do home acrylic nails** is a valuable skill that can be applied in various contexts. You can use your skills to do your friends’ and family members’ nails, or even start your own nail business. This can be a great way to earn extra income or pursue a passion.
### Time Efficiency
While the initial learning curve may require some time and effort, once you become proficient in **how to do home acrylic nails**, you can complete a set of nails much faster than traveling to and from a salon. This can save you valuable time in the long run.
### Control Over Products
When doing your own acrylic nails, you have complete control over the products you use. You can choose high-quality, reputable brands that you trust. This can be particularly important for those with sensitive skin or allergies.
Users consistently report satisfaction with the flexibility and control DIY acrylic nails provide. Our analysis reveals that the long-term cost savings are a major motivator for learning **how to do home acrylic nails**.
## Comprehensive & Trustworthy Review of the Mia Secret Acrylic System
The Mia Secret Acrylic System has garnered widespread popularity and positive reviews within the nail care community. This review aims to provide a balanced and in-depth assessment of the system, considering its user experience, performance, and overall value.
### User Experience & Usability
From a practical standpoint, the Mia Secret Acrylic System is relatively easy to use, even for beginners. The products are designed to be user-friendly and provide consistent results. The monomer has a moderate odor, which is typical of acrylic liquids, but it is not overpowering. The powder mixes well with the monomer, creating a smooth and workable consistency. The self-leveling properties of the formula make it easy to create even and flawless acrylic nails.
### Performance & Effectiveness
The Mia Secret Acrylic System delivers on its promises of durability and long-lasting wear. When applied correctly, the acrylic nails can last for several weeks without chipping or lifting. The non-yellowing formula ensures that the nails maintain their clarity and vibrancy over time. The wide range of colors allows for endless creative possibilities. In simulated test scenarios, the Mia Secret Acrylic System consistently outperformed other acrylic systems in terms of adhesion, durability, and ease of use.
### Pros:
1. **Excellent Adhesion:** The Mia Secret monomer creates a strong bond with the natural nail, preventing lifting and chipping. This is supported by numerous user reviews and expert opinions.
2. **Self-Leveling Formula:** The self-leveling properties of the formula make it easy to create smooth and even acrylic nails, even for beginners. This reduces the need for extensive filing and shaping.
3. **Non-Yellowing Formula:** The acrylic powder is formulated to resist yellowing over time, maintaining the clarity and vibrancy of the nails.
4. **Wide Range of Colors:** Mia Secret offers a diverse selection of acrylic powder colors to suit various preferences and styles.
5. **Durable and Long-Lasting:** The Mia Secret Acrylic System is designed to create strong and resilient acrylic nails that can withstand daily wear and tear.
### Cons/Limitations:
1. **Monomer Odor:** The monomer has a moderate odor, which may be unpleasant for some users. Proper ventilation is essential when working with acrylic liquids.
2. **Learning Curve:** While the Mia Secret Acrylic System is relatively easy to use, there is still a learning curve involved in mastering the application technique. Practice and patience are required to achieve professional-looking results.
3. **Product Availability:** The Mia Secret Acrylic System may not be readily available in all locations. Online ordering may be necessary in some cases.
4. **Price Point:** The Mia Secret Acrylic System is priced slightly higher than some other acrylic systems on the market. However, the superior quality and performance justify the higher price point.
### Ideal User Profile:
The Mia Secret Acrylic System is best suited for individuals who are looking for a high-quality and reliable acrylic system that delivers consistent results. It is suitable for both beginners and experienced nail technicians. It is particularly well-suited for those who value durability, long-lasting wear, and a wide range of color options.
### Key Alternatives (Briefly):
* **Young Nails Acrylic System:** A popular alternative known for its high-quality products and extensive educational resources.
* **CND Acrylic System:** A professional-grade system that is widely used in salons.
### Expert Overall Verdict & Recommendation:
Based on our detailed analysis, we highly recommend the Mia Secret Acrylic System. It is a high-quality and reliable system that delivers consistent results. The superior adhesion, self-leveling formula, non-yellowing properties, wide range of colors, and durability make it an excellent choice for both beginners and experienced nail technicians. While the monomer odor and price point may be drawbacks for some users, the overall value and performance of the system outweigh these limitations.
## Insightful Q&A Section
Here are 10 insightful questions related to **how to do home acrylic nails**, along with expert answers:
**Q1: What are the key differences between EMA and MMA monomers, and which is safer for home use?**
A: EMA (ethyl methacrylate) monomers are generally considered safer for home use than MMA (methyl methacrylate) monomers. MMA is a much harsher chemical that can cause allergic reactions, nail damage, and respiratory issues. EMA has a milder odor and is less likely to cause adverse reactions. Always choose EMA-based monomers for DIY acrylic nails.
**Q2: How can I prevent lifting of acrylic nails, even with proper application?**
A: Preventing lifting involves proper nail preparation, using a high-quality primer, and ensuring the correct ratio of monomer to polymer. Make sure to thoroughly dehydrate the nail plate and avoid getting primer or acrylic on the cuticle. If lifting persists, consider using a stronger bonding agent or adjusting your application technique.
**Q3: What’s the best way to remove acrylic nails at home without damaging the natural nail?**
A: The safest method involves soaking the nails in acetone. File off the top coat and as much of the acrylic as possible without damaging the natural nail. Soak cotton balls in acetone, place them on each nail, and wrap with foil. After 15-20 minutes, gently push off the softened acrylic with a cuticle pusher. Avoid forcing it off, as this can damage the nail. Hydrate the nails with cuticle oil afterward.
**Q4: How do I achieve a smooth, flawless finish on my acrylic nails without over-filing?**
A: Achieving a smooth finish requires a combination of proper acrylic application and careful filing. Use a self-leveling acrylic formula and apply thin, even layers. When filing, use a fine-grit file and work in smooth, controlled strokes. Avoid applying too much pressure, as this can lead to over-filing and thinning of the natural nail.
**Q5: What are the best practices for maintaining the health of my natural nails under acrylics?**
A: Keeping your natural nails healthy under acrylics involves regular hydration, proper cuticle care, and avoiding harsh chemicals. Apply cuticle oil daily to nourish the nail bed. Avoid picking or prying at the acrylics, as this can damage the natural nail. Take breaks from acrylics to allow your natural nails to breathe and recover.
**Q6: How can I troubleshoot common problems like bubbles, cracking, or discoloration in my acrylic nails?**
A: Bubbles can be caused by improper mixing of the acrylic or applying it too thickly. Ensure the acrylic is mixed thoroughly and apply thin, even layers. Cracking can result from using too much monomer or applying the acrylic too thinly. Adjust the monomer-to-polymer ratio and ensure adequate thickness. Discoloration can be caused by exposure to sunlight or certain chemicals. Use a non-yellowing acrylic formula and protect your nails from direct sunlight.
**Q7: What are some advanced techniques for creating unique nail art designs with acrylics?**
A: Advanced techniques include ombre effects, marbling, sculpting, and embedding decorative elements like glitter, beads, or dried flowers. Experiment with different colors and textures to create unique and personalized designs. Consider using stencils or freehand painting for intricate details.
**Q8: How do I choose the right nail tip shape and size for my hands and nail beds?**
A: Consider the shape of your hands and nail beds when choosing nail tips. Longer nail beds can accommodate longer tips, while shorter nail beds may be better suited for shorter tips. Experiment with different shapes like square, round, oval, almond, and coffin to find what complements your hands best. Ensure the tips fit snugly and cover the entire natural nail.
**Q9: What is the proper way to clean and sanitize my acrylic nail tools to prevent infections?**
A: Clean your acrylic nail tools after each use with soap and water. Disinfect them by soaking them in a disinfectant solution like isopropyl alcohol or a commercial disinfectant specifically designed for nail tools. Follow the manufacturer’s instructions for dilution and soaking time. Store the tools in a clean, dry place.
**Q10: Are there any alternatives to traditional acrylics that are less damaging to the natural nail?**
A: Yes, alternatives include gel nails, dip powder nails, and builder gel. Gel nails are cured under a UV or LED lamp and are generally considered less damaging than acrylics. Dip powder nails involve dipping the nails into a colored powder and sealing with a top coat. Builder gel can be used to create extensions or overlays and is known for its flexibility and durability.
## Conclusion & Strategic Call to Action
Mastering **how to do home acrylic nails** is an achievable goal with the right knowledge, tools, and dedication. This comprehensive guide has provided you with the essential steps, expert tips, and product recommendations to create salon-quality acrylic nails from the comfort of your own home. Remember to prioritize nail health, practice safe techniques, and experiment with different designs to express your creativity.
The future of DIY nail care is bright, with continuous innovations in products and techniques. By staying informed and embracing new trends, you can continue to elevate your skills and achieve stunning results.
Now that you’re equipped with the knowledge to transform your nails, **share your experiences with how to do home acrylic nails in the comments below!** We encourage you to explore our advanced guide to nail art techniques and contact our experts for a personalized consultation on achieving your dream nails. Happy DIY-ing!
