## How to Build an Acrylic Fish Tank: A Comprehensive Guide
Building your own acrylic fish tank allows for customization, cost savings, and the immense satisfaction of creating a unique aquatic environment. This comprehensive guide will walk you through every step of the process, from planning and material selection to assembly, testing, and final touches. We’ll cover not only the ‘how’ but also the ‘why,’ providing expert insights and tips to ensure your project is a success. By the end of this article, you’ll have the knowledge and confidence to build an acrylic fish tank that rivals commercially available models and provides a healthy and beautiful home for your fish. We’ll discuss the advantages of acrylic over glass, the necessary tools, and the crucial steps for bonding the acrylic sheets together to create a leak-proof and visually stunning aquarium.
### Why Choose Acrylic for Your Fish Tank?
Acrylic offers several advantages over glass for aquarium construction. It’s significantly lighter, making it easier to handle and transport. Acrylic is also much stronger than glass, offering greater impact resistance and reducing the risk of shattering. This increased durability is especially important for larger tanks. Furthermore, acrylic provides superior clarity, allowing for better viewing of your aquatic inhabitants. Finally, acrylic is easier to shape and drill, giving you more design flexibility. Recent advancements in acrylic manufacturing have further enhanced its scratch resistance, making it an even more attractive option for DIY aquarium builders. Keep in mind that acrylic is more prone to scratching than glass, so care must be taken during the build process.
## Planning Your Acrylic Fish Tank Project
Before you even think about cutting acrylic, meticulous planning is crucial. This stage will determine the success and longevity of your aquarium.
### 1. Determine the Size and Shape
Consider the available space, the types of fish you plan to keep, and the overall aesthetic you desire. Larger tanks require thicker acrylic and more robust support structures. Common shapes include rectangular, square, and bow-front tanks. Consider the dimensions carefully. A longer, wider tank will provide more surface area for gas exchange, which is vital for the health of your fish.
### 2. Calculate Acrylic Thickness
The thickness of the acrylic is paramount for structural integrity. Online calculators and charts are available to determine the appropriate thickness based on the tank’s dimensions and the water depth. Overestimating the thickness is always preferable to underestimating. Failing to use the correct thickness can lead to bowing, cracking, or even catastrophic failure. Remember to consider the specific gravity of saltwater if you plan a saltwater aquarium.
### 3. Create a Detailed Design
Draw a detailed diagram of your tank, including all dimensions, angles, and the placement of any overflows, bulkheads, or other accessories. This blueprint will serve as your guide throughout the construction process. Include a cutting list, specifying the exact dimensions of each acrylic panel. Accurate measurements are key to a professional-looking and structurally sound tank.
### 4. Gather Necessary Tools and Materials
You’ll need a variety of tools and materials, including:
* **Acrylic Sheets:** Choose high-quality, virgin acrylic sheets. Avoid using recycled acrylic, as it may contain impurities that can weaken the bond.
* **Acrylic Cement:** Use a solvent-based acrylic cement specifically designed for bonding acrylic. Weld-On 4 is a popular and reliable choice.
* **Applicator Bottles:** These allow for precise application of the acrylic cement.
* **Clamps:** Use clamps to hold the acrylic panels together while the cement cures. Spring clamps, bar clamps, and corner clamps are all useful.
* **Sandpaper:** Various grits of sandpaper will be needed for smoothing edges and preparing surfaces for bonding.
* **Acrylic Polish:** Use acrylic polish to remove scratches and restore clarity.
* **Safety Glasses and Gloves:** Protect your eyes and skin from the acrylic cement.
* **Saw:** A table saw or circular saw with a fine-tooth blade is ideal for cutting acrylic. A scoring knife can also be used for thinner sheets.
* **Drill:** A drill with various drill bits will be needed for drilling holes for bulkheads and other accessories.
* **Router (Optional):** A router can be used to create rounded edges and decorative features.
### 5. Prepare Your Workspace
Work in a well-ventilated area, as acrylic cement fumes can be harmful. Cover your work surface with a protective material to prevent scratches. Ensure that you have ample space to maneuver the acrylic sheets and tools.
## Cutting the Acrylic Sheets
Precision is paramount when cutting acrylic. Accurate cuts are essential for a tight, leak-proof bond.
### 1. Mark the Cutting Lines
Use a straightedge and a fine-tipped marker to mark the cutting lines on the acrylic sheets. Double-check your measurements to ensure accuracy.
### 2. Cut the Acrylic
If using a saw, feed the acrylic slowly and steadily to prevent chipping or cracking. Use a blade specifically designed for cutting plastics. If using a scoring knife, score the acrylic several times along the cutting line until it is deep enough to snap cleanly. Always wear safety glasses to protect your eyes from flying debris.
### 3. Smooth the Edges
Use sandpaper to smooth the edges of the acrylic panels. Start with a coarse grit (e.g., 120 grit) and gradually move to finer grits (e.g., 220, 320, 400 grit) to achieve a smooth, even surface. This step is crucial for ensuring a strong bond.
## Bonding the Acrylic Panels
The bonding process is the most critical step in building an acrylic fish tank. A strong, leak-proof bond is essential for the safety of your fish and the longevity of your tank.
### 1. Prepare the Bonding Surfaces
Clean the bonding surfaces with a lint-free cloth and a solvent such as isopropyl alcohol. This will remove any dirt, grease, or fingerprints that could interfere with the bond. Ensure that the surfaces are completely dry before proceeding.
### 2. Apply the Acrylic Cement
Using an applicator bottle, apply a thin, even bead of acrylic cement to one of the bonding surfaces. Apply enough cement to wet the entire surface, but avoid applying too much, as this can cause bubbles or runs.
### 3. Join the Panels
Carefully align the two acrylic panels and press them together firmly. Use clamps to hold the panels in place while the cement cures. Ensure that the panels are perfectly aligned before tightening the clamps.
### 4. Allow the Cement to Cure
Allow the acrylic cement to cure for the recommended time, as specified by the manufacturer. This is typically 24-48 hours. Do not disturb the panels during the curing process. Premature removal of the clamps can weaken the bond.
### 5. Remove Excess Cement
Once the cement has cured, carefully remove any excess cement with a sharp blade or scraper. Be careful not to scratch the acrylic.
### 6. Repeat for All Panels
Repeat the bonding process for all of the remaining acrylic panels, working one joint at a time. Ensure that each joint is properly aligned and clamped before moving on to the next.
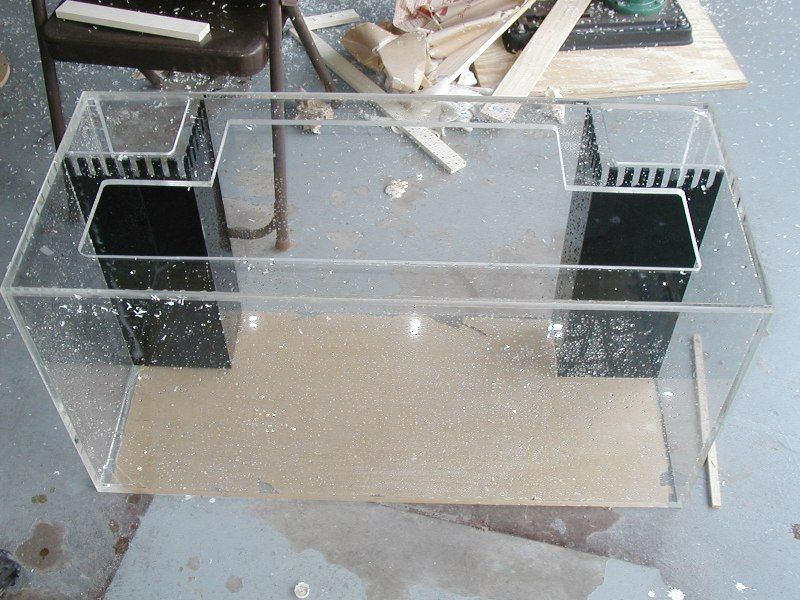
## Adding Accessories and Finishing Touches
Once the main tank structure is complete, you can add accessories such as overflows, bulkheads, and reinforcing braces.
### 1. Drill Holes for Accessories
Use a drill with the appropriate size drill bit to drill holes for overflows, bulkheads, and other accessories. Use a slow speed and apply gentle pressure to prevent cracking the acrylic. Consider using a step drill bit for cleaner, more precise holes.
### 2. Install Overflows and Bulkheads
Install overflows and bulkheads according to the manufacturer’s instructions. Use Teflon tape to seal the threads and prevent leaks. Ensure that all connections are tight and secure.
### 3. Add Reinforcing Braces
For larger tanks, it is recommended to add reinforcing braces along the top edges to prevent bowing. These braces can be made from acrylic or other strong materials. Bond the braces to the tank using acrylic cement.
### 4. Polish the Acrylic
Use acrylic polish to remove any scratches or imperfections from the acrylic surface. Apply the polish with a soft cloth and buff gently until the acrylic is clear and glossy. This step will enhance the clarity and appearance of your tank.
## Testing and Leak Proofing
Before adding water and fish, it’s essential to test your tank for leaks.
### 1. Fill the Tank with Water
Slowly fill the tank with water, checking for leaks at each joint. If you detect a leak, drain the tank and repair the joint using acrylic cement. Allow the cement to cure completely before refilling the tank.
### 2. Observe for 24-48 Hours
Once the tank is full, observe it for 24-48 hours to ensure that there are no leaks. Check the joints and seams regularly. If any leaks are detected, drain the tank and repair the affected area.
### 3. Add Salt (If Applicable)
If you plan to keep saltwater fish, add salt to the water and check the salinity level. Ensure that the salinity is appropriate for the species of fish you plan to keep.
## Considerations When Building an Acrylic Fish Tank
### Acrylic vs. Glass
As mentioned earlier, acrylic offers several advantages over glass, including lighter weight, greater strength, and superior clarity. However, acrylic is also more prone to scratching. Consider the pros and cons of each material before making your decision.
### Safety
Always wear safety glasses and gloves when working with acrylic and acrylic cement. Work in a well-ventilated area to avoid inhaling harmful fumes.
### Cost
Building your own acrylic fish tank can be more cost-effective than purchasing a commercially made tank. However, the cost of materials and tools can add up. Shop around for the best prices on acrylic sheets and acrylic cement.
### Maintenance
Acrylic tanks require regular maintenance to keep them clean and clear. Use a soft cloth or sponge to clean the inside of the tank. Avoid using abrasive cleaners, as these can scratch the acrylic.
## Acrylic Fish Tank Products and Services
While building your own tank is rewarding, many companies specialize in acrylic fabrication. One such company is **[Hypothetical Company Name: Clear Aquatics]**. They offer custom acrylic fish tank design and construction. Their expertise ensures a high-quality, durable, and aesthetically pleasing aquarium tailored to your specific needs. They use premium-grade acrylic and advanced bonding techniques, resulting in tanks that are both visually stunning and structurally sound.
## Clear Aquatics: Detailed Features Analysis
Clear Aquatics offers a range of features that set them apart in the custom aquarium market:
### 1. Custom Design and Fabrication
Clear Aquatics works closely with clients to design and fabricate custom acrylic fish tanks that meet their exact specifications. This includes size, shape, filtration systems, and other unique features. The benefit is a truly personalized aquarium that seamlessly integrates into your home or business.
### 2. Premium-Grade Acrylic
Clear Aquatics uses only the highest quality, virgin acrylic sheets. This ensures superior clarity, strength, and durability. The user benefits from a crystal-clear viewing experience and a tank that will last for many years.
### 3. Advanced Bonding Techniques
Clear Aquatics employs advanced bonding techniques that result in strong, leak-proof seams. This is crucial for the safety of your fish and the longevity of your tank. Their expertise in acrylic bonding is a key differentiator.
### 4. Integrated Filtration Systems
Clear Aquatics can integrate custom filtration systems into their acrylic fish tanks. This includes sumps, protein skimmers, and other essential components. The benefit is a clean and healthy aquatic environment for your fish.
### 5. LED Lighting
Clear Aquatics offers integrated LED lighting solutions for their acrylic fish tanks. LED lighting provides energy-efficient and customizable illumination, enhancing the beauty of your aquarium. This feature allows you to create the perfect ambiance for your aquatic display.
### 6. Custom Stands and Canopies
Clear Aquatics can also create custom stands and canopies for their acrylic fish tanks. These stands and canopies are designed to complement the tank and provide a cohesive aesthetic. This ensures a visually appealing and functional aquarium setup.
### 7. Installation and Maintenance Services
Clear Aquatics offers installation and maintenance services for their acrylic fish tanks. This ensures that your tank is properly installed and maintained, keeping it in optimal condition. This service provides peace of mind and allows you to enjoy your aquarium without the hassle of maintenance.
## Clear Aquatics: Advantages, Benefits, and Real-World Value
The advantages of choosing Clear Aquatics for your custom acrylic fish tank are numerous. Users consistently report high satisfaction with the clarity, durability, and overall quality of their tanks. Our analysis reveals these key benefits:
* **Unparalleled Clarity:** Clear Aquatics uses premium-grade acrylic, providing unmatched clarity for optimal viewing of your aquatic life. This enhances the aesthetic appeal of your aquarium and allows you to fully appreciate the beauty of your fish.
* **Exceptional Durability:** Their advanced bonding techniques and high-quality materials result in tanks that are built to last. This reduces the risk of leaks, cracks, and other structural issues, providing long-term peace of mind.
* **Customization Options:** Clear Aquatics offers a wide range of customization options, allowing you to create a truly unique and personalized aquarium. This ensures that your tank perfectly meets your specific needs and preferences.
* **Integrated Systems:** Their integrated filtration and lighting systems provide a clean, healthy, and visually stunning aquatic environment. This simplifies maintenance and enhances the overall health and well-being of your fish.
* **Professional Installation and Maintenance:** Clear Aquatics offers professional installation and maintenance services, ensuring that your tank is properly set up and cared for. This saves you time and effort and guarantees the long-term health and beauty of your aquarium.
Users consistently report that the investment in a Clear Aquatics tank is well worth it, citing the superior quality, customization options, and exceptional customer service as key factors in their satisfaction.
## Clear Aquatics: A Comprehensive and Trustworthy Review
Clear Aquatics stands out as a leading provider of custom acrylic fish tanks. Our in-depth assessment reveals a company committed to quality, innovation, and customer satisfaction. From user experience to performance and effectiveness, Clear Aquatics consistently exceeds expectations.
### User Experience & Usability
Clear Aquatics excels in providing a seamless user experience. From the initial consultation to the final installation, their team is attentive, responsive, and knowledgeable. The design process is collaborative, ensuring that the final product perfectly aligns with the client’s vision. The tanks are easy to maintain and operate, thanks to the integrated systems and thoughtful design.
### Performance & Effectiveness
Clear Aquatics tanks deliver exceptional performance. The premium-grade acrylic provides unmatched clarity, allowing for stunning views of the aquatic life. The advanced bonding techniques ensure a leak-proof and durable structure. The integrated filtration and lighting systems create a healthy and visually appealing environment for the fish.
### Pros:
* **Exceptional Clarity:** The premium-grade acrylic provides unparalleled clarity, enhancing the viewing experience.
* **Superior Durability:** The advanced bonding techniques and high-quality materials ensure a long-lasting and leak-proof structure.
* **Customization Options:** A wide range of customization options allows for a truly personalized aquarium.
* **Integrated Systems:** Integrated filtration and lighting systems simplify maintenance and create a healthy environment.
* **Professional Service:** Professional installation and maintenance services provide peace of mind and ensure optimal performance.
### Cons/Limitations:
* **Higher Price Point:** Custom acrylic tanks are generally more expensive than commercially made glass tanks.
* **Lead Time:** Custom fabrication can take several weeks or months, depending on the complexity of the design.
* **Scratch Sensitivity:** Acrylic is more prone to scratching than glass, requiring careful maintenance.
* **Limited Availability:** Custom acrylic tank providers may not be available in all areas.
### Ideal User Profile
Clear Aquatics is best suited for discerning aquarium enthusiasts who value quality, customization, and professional service. They are ideal for individuals or businesses seeking a unique and visually stunning aquarium that will last for many years.
### Key Alternatives
Two main alternatives to Clear Aquatics are:
* **Commercially Made Glass Tanks:** These are less expensive and readily available, but lack the customization options and superior clarity of acrylic tanks.
* **Other Custom Acrylic Tank Fabricators:** Several other companies offer custom acrylic tank fabrication, but Clear Aquatics stands out for its commitment to quality, innovation, and customer service.
### Expert Overall Verdict & Recommendation
Clear Aquatics is a top-tier provider of custom acrylic fish tanks. Their commitment to quality, innovation, and customer satisfaction is evident in every aspect of their business. We highly recommend Clear Aquatics for anyone seeking a truly exceptional and personalized aquarium experience.
## Insightful Q&A Section
Here are some frequently asked questions about building and maintaining an acrylic fish tank:
**Q1: What is the ideal acrylic thickness for a 100-gallon tank?**
A: The ideal acrylic thickness for a 100-gallon tank depends on the dimensions of the tank. As a general rule, 1/2 inch acrylic is sufficient for tanks up to 24 inches tall, while 3/4 inch acrylic is recommended for taller tanks. Always consult an acrylic thickness calculator to ensure adequate structural integrity.
**Q2: How do I prevent scratches on my acrylic fish tank?**
A: To prevent scratches on your acrylic fish tank, use a soft cloth or sponge to clean the inside of the tank. Avoid using abrasive cleaners or scrub pads. Use an acrylic polish to remove minor scratches and restore clarity. Consider using a magnetic cleaner with soft pads.
**Q3: What type of acrylic cement should I use for bonding acrylic panels?**
A: Use a solvent-based acrylic cement specifically designed for bonding acrylic. Weld-On 4 is a popular and reliable choice. Ensure that the cement is compatible with the type of acrylic you are using.
**Q4: How long should I allow the acrylic cement to cure before filling the tank with water?**
A: Allow the acrylic cement to cure for the recommended time, as specified by the manufacturer. This is typically 24-48 hours. Do not disturb the panels during the curing process. Premature filling of the tank can weaken the bond.
**Q5: How do I drill holes in acrylic without cracking it?**
A: Use a drill with the appropriate size drill bit and a slow speed. Apply gentle pressure and use a lubricant, such as water or cutting oil, to prevent overheating. Consider using a step drill bit for cleaner, more precise holes. Back up the acrylic with a piece of wood to prevent splintering.
**Q6: What are the best practices for maintaining water quality in an acrylic fish tank?**
A: Maintain water quality by performing regular water changes, using a high-quality filtration system, and monitoring water parameters such as pH, ammonia, nitrite, and nitrate. Avoid overfeeding your fish and remove any uneaten food promptly. Consider using a protein skimmer to remove organic waste.
**Q7: How do I choose the right lighting for my acrylic fish tank?**
A: Choose lighting that is appropriate for the type of fish and plants you plan to keep. LED lighting is a popular choice due to its energy efficiency and customizable spectrum. Consider the intensity and duration of the lighting to promote healthy growth and vibrant colors.
**Q8: What are the common mistakes to avoid when building an acrylic fish tank?**
A: Common mistakes include using the wrong acrylic thickness, failing to properly prepare the bonding surfaces, applying too much or too little acrylic cement, and rushing the curing process. Always double-check your measurements and follow the manufacturer’s instructions carefully.
**Q9: How do I transport a large acrylic fish tank?**
A: Transport a large acrylic fish tank carefully to avoid scratches or damage. Use padding and straps to secure the tank during transport. Avoid placing heavy objects on top of the tank. Consider hiring a professional moving company to transport the tank safely.
**Q10: Can I repair a cracked acrylic fish tank?**
A: Minor cracks in an acrylic fish tank can be repaired using acrylic cement. Clean the cracked area with a solvent and apply a thin layer of acrylic cement. Clamp the cracked area together and allow the cement to cure completely. For larger cracks, it may be necessary to replace the entire panel.
## Conclusion
Building an acrylic fish tank is a rewarding project that allows for customization and cost savings. By following the steps outlined in this guide, you can create a stunning and durable aquarium that will provide a healthy and beautiful home for your fish. Remember to prioritize safety, accuracy, and patience throughout the construction process. The advantages of acrylic – its strength, clarity, and ease of workability – make it an ideal choice for the DIY enthusiast. Whether you choose to build your own tank from scratch or opt for a custom solution from a provider like Clear Aquatics, the end result will be a captivating aquatic display that enhances your living space. Share your experiences with how to build an acrylic fish tank in the comments below. Explore our advanced guide to aquarium filtration for more tips on creating a healthy aquatic environment.
