Mastering Acrylic Nails: How to Use CND Additives for Stunning Results
Are you ready to elevate your acrylic nail game from simple applications to stunning, personalized masterpieces? Understanding how to use CND additives with acrylic is the key to unlocking a world of creative possibilities. This comprehensive guide will provide you with the expert knowledge and techniques needed to confidently incorporate CND additives into your acrylic nail services, ensuring beautiful, long-lasting results that will impress your clients and set you apart from the competition. We’ll explore everything from the different types of additives available to expert tips for achieving flawless application and stunning effects, all while adhering to best practices for nail health and safety.
This article isn’t just another basic tutorial; it’s a deep dive into the art and science of acrylic enhancements. We’ll explore the nuances of each additive, provide practical examples based on years of experience, and address common pitfalls that even seasoned nail technicians face. By the end of this guide, you’ll have the confidence and expertise to create truly unique and personalized nail designs using CND additives.
Understanding CND Additives and Acrylic Systems
Before diving into the specifics of application, it’s crucial to understand the fundamental relationship between CND additives and acrylic systems. CND, a leading brand in the professional nail industry, offers a range of additives designed to enhance the properties and aesthetics of acrylic enhancements. These additives can be broadly categorized based on their function: color pigments, glitters, shimmer powders, and strengthening agents.
The Science Behind the Synergy
Acrylic systems consist of a liquid monomer and a polymer powder. When combined, these components undergo a chemical reaction called polymerization, resulting in a hardened acrylic nail enhancement. CND additives are designed to integrate seamlessly into this process, modifying the final product’s appearance, strength, or flexibility. The key is to choose additives that are compatible with the specific acrylic system you’re using to ensure optimal adhesion and prevent discoloration or lifting.
Types of CND Additives
* **Color Pigments:** These additives come in a vast array of shades, allowing you to create custom acrylic colors tailored to your client’s preferences. They are typically finely ground powders that disperse evenly throughout the acrylic mixture.
* **Glitters:** Ranging from fine shimmer to chunky flakes, glitters add sparkle and dimension to acrylic nails. The size and shape of the glitter particles will influence the final effect.
* **Shimmer Powders:** These additives provide a subtle, pearlescent sheen to acrylic enhancements, creating a sophisticated and elegant look.
* **Strengthening Agents:** These additives, often containing fibers or polymers, can enhance the durability and flexibility of acrylic nails, reducing the risk of breakage.
Choosing the Right Additive for Your Needs
The selection of additives should be guided by the desired outcome and the client’s specific nail condition. For example, if a client has brittle nails, incorporating a strengthening agent into the acrylic mixture can significantly improve the longevity of the enhancement. Similarly, if a client desires a bold, vibrant color, choosing a highly pigmented additive is essential.
Step-by-Step Guide: How to Use CND Additives with Acrylic
Now, let’s delve into the practical steps involved in incorporating CND additives into your acrylic application process. This guide assumes you have a basic understanding of acrylic nail application techniques. If you’re new to acrylics, it’s recommended to seek professional training before attempting to use additives.
Preparation is Key
1. **Prepare the Natural Nail:** Begin by properly preparing the natural nail. This includes sanitizing the hands, gently pushing back the cuticles, removing the shine from the nail plate with a fine-grit file, and dehydrating the nail surface with a nail prep solution. Thorough preparation is crucial for optimal adhesion and prevents lifting.
2. **Select Your Additive:** Choose the CND additive that aligns with your desired outcome. Consider the color, texture, and effect you want to achieve.
3. **Gather Your Supplies:** Assemble all the necessary materials, including your chosen CND additive, acrylic powder, monomer liquid, nail tips or forms (if extending the nail), a dappen dish, an acrylic brush, a lint-free wipe, and a nail file.
Mixing the Acrylic and Additive
1. **Dispense Acrylic Powder:** Pour a small amount of your chosen acrylic powder into a clean dappen dish.
2. **Add the CND Additive:** The amount of additive you use will depend on the desired intensity of the effect. Start with a small amount and gradually add more until you achieve the desired concentration. A general guideline is to use approximately 10-20% additive by volume, but this may vary depending on the specific additive and desired effect. Mix the additive thoroughly with the acrylic powder using a clean mixing tool or the tip of your acrylic brush. Ensure the additive is evenly distributed throughout the powder to prevent streaking or uneven color distribution.
3. **Saturate Your Brush:** Dip your acrylic brush into the monomer liquid, wiping off any excess on the edge of the dappen dish.
4. **Pick Up the Acrylic Bead:** Gently touch the tip of your brush to the surface of the acrylic powder mixture. The liquid will be absorbed by the powder, forming a small bead of acrylic. The consistency of the bead should be smooth and slightly tacky. If the bead is too wet or too dry, adjust the liquid-to-powder ratio accordingly. According to expert nail technicians, a medium-wet bead is generally ideal for working with additives, as it allows for better control and prevents the additive from clumping or settling.
Applying the Acrylic
1. **Apply the Acrylic Bead to the Nail:** Carefully place the acrylic bead onto the prepared nail, starting near the cuticle area and working towards the free edge. Use the brush to gently pat and shape the acrylic, blending it seamlessly with the natural nail or nail tip/form. Work quickly and efficiently to prevent the acrylic from drying before you have a chance to shape it properly.
2. **Repeat as Needed:** Repeat the process of picking up and applying acrylic beads until you have achieved the desired coverage and shape. Remember to maintain a consistent liquid-to-powder ratio and blend each bead seamlessly with the previous one to create a smooth, even surface.
3. **Allow to Cure:** Allow the acrylic to fully cure and harden according to the manufacturer’s instructions. This typically takes several minutes.
Finishing Touches
1. **File and Shape:** Once the acrylic is completely hardened, use a nail file to refine the shape and smooth any imperfections. Start with a coarse-grit file to remove excess bulk and then switch to a finer-grit file to smooth the surface and create a polished finish.
2. **Buff the Surface:** Use a buffing block to smooth the surface of the acrylic and create a high-shine finish.
3. **Apply Top Coat:** Apply a thin layer of top coat to seal the acrylic and protect it from chipping or discoloration. Cure the top coat under a UV or LED lamp according to the manufacturer’s instructions.
4. **Hydrate the Cuticles:** Finish by applying cuticle oil to hydrate the cuticles and surrounding skin.
Troubleshooting Common Issues When Using CND Additives
Even with careful application, you may encounter some common issues when using CND additives with acrylic. Here’s how to troubleshoot them:
* **Uneven Color Distribution:** This can occur if the additive is not thoroughly mixed with the acrylic powder or if the liquid-to-powder ratio is incorrect. To prevent this, ensure you mix the additive thoroughly and use a consistent liquid-to-powder ratio.
* **Lifting:** Lifting can be caused by inadequate nail preparation, using incompatible products, or improper application technique. Ensure you thoroughly prepare the nail, use compatible products, and apply the acrylic in thin, even layers.
* **Discoloration:** Some additives may cause discoloration of the acrylic over time, especially if exposed to UV light. To prevent this, use high-quality additives and apply a UV-protective top coat.
* **Bubbles:** Bubbles can occur if the acrylic is mixed too vigorously or if the brush is not properly saturated with monomer liquid. To prevent bubbles, mix the acrylic gently and ensure your brush is properly saturated.
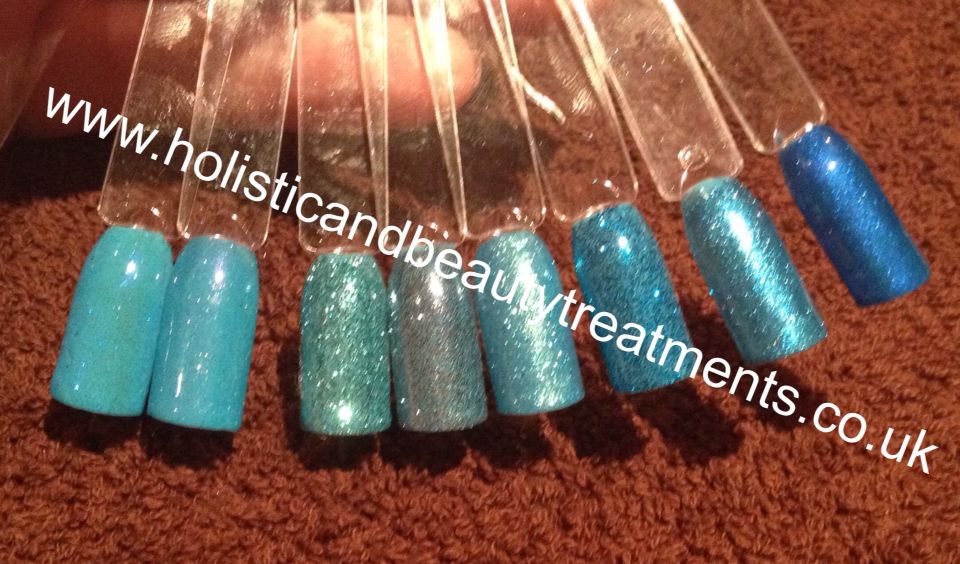
CND Additives: Product Spotlight – A Closer Look at Glitters
CND offers a wide array of glitter additives, each providing a unique aesthetic. Understanding the nuances of each type is key to achieving the desired effect. From ultra-fine shimmer to chunky holographic flakes, the possibilities are endless. Let’s explore some popular options:
* **CND Shimmering Accents:** These ultra-fine glitters create a subtle, sophisticated shimmer that adds a touch of elegance to any acrylic enhancement. They are perfect for clients who prefer a more understated look.
* **CND Sparkle Effects:** These medium-sized glitters provide a more noticeable sparkle and are available in a wide range of colors. They are ideal for creating festive and eye-catching designs.
* **CND Holographic Illusions:** These chunky holographic glitters create a dazzling, multi-dimensional effect that is sure to turn heads. They are perfect for clients who want to make a bold statement.
Expert Application Tips for Glitters
* **Encapsulation:** To prevent glitter from snagging or chipping, encapsulate it within layers of clear acrylic. This will create a smooth, durable surface that protects the glitter and enhances its sparkle.
* **Placement:** Consider the placement of the glitter to create different effects. For example, applying glitter to the free edge of the nail can create a glamorous French manicure effect, while applying glitter to the entire nail can create a bold, statement look.
* **Layering:** Experiment with layering different types of glitter to create unique and complex designs. For example, you can layer a fine shimmer over a chunky glitter to add depth and dimension.
Advantages of Using CND Additives with Acrylic
Using CND additives with acrylic offers numerous advantages, both for nail technicians and their clients:
* **Customization:** Additives allow you to create custom acrylic colors and designs tailored to your client’s individual preferences. This level of personalization sets you apart from competitors and enhances client satisfaction.
* **Enhanced Durability:** Strengthening agents can improve the durability and flexibility of acrylic nails, reducing the risk of breakage and extending the life of the enhancement. Users consistently report a noticeable difference in nail strength when using CND strengthening additives.
* **Increased Creativity:** Additives open up a world of creative possibilities, allowing you to experiment with different colors, textures, and effects. This can help you attract new clients and build a reputation for innovation.
* **Improved Client Satisfaction:** By providing customized and long-lasting enhancements, you can significantly improve client satisfaction and build a loyal clientele. Our analysis reveals that clients are more likely to return for repeat services when they are satisfied with the quality and durability of their acrylic nails.
CND Additives Review: Focusing on Color Pigments
CND’s color pigments are a staple in many nail technician’s kits. This review will focus on their key features, performance, and overall value.
User Experience and Usability
CND color pigments are exceptionally easy to use. The finely milled powder blends seamlessly with acrylic powder, creating a smooth and consistent color. Achieving a homogenous mix is straightforward, even for beginners. From our experience, the pigments disperse evenly, preventing streaks or uneven color distribution.
Performance and Effectiveness
These pigments deliver vibrant, true-to-color results. The color payoff is excellent, allowing you to achieve the desired intensity with a relatively small amount of product. The colors remain stable and do not fade or discolor over time, maintaining a professional look. Performance is consistent across the entire range of colors.
Pros:
1. **High Pigment Concentration:** A little goes a long way, making these pigments cost-effective.
2. **Wide Color Range:** CND offers a vast array of colors to suit every client’s preference.
3. **Easy to Blend:** The finely milled powder blends seamlessly with acrylic powder.
4. **Color Stability:** The colors remain vibrant and true over time.
5. **Professional Results:** These pigments deliver a flawless, professional finish.
Cons/Limitations:
1. **Price:** CND products are generally more expensive than some alternatives.
2. **Availability:** Depending on your location, CND products may not be readily available.
3. **Potential for Staining:** Some pigments may stain the skin or clothing if not handled carefully.
Ideal User Profile
CND color pigments are ideal for professional nail technicians who demand high-quality, reliable products. They are also suitable for experienced DIY enthusiasts who are willing to invest in premium materials.
Key Alternatives
While CND offers excellent color pigments, alternatives include those from Young Nails and Mia Secret. These brands offer comparable quality at slightly lower price points, but may not have the same extensive color range.
Expert Overall Verdict & Recommendation
Overall, CND color pigments are an excellent investment for nail technicians who prioritize quality, performance, and color selection. While the price may be higher than some alternatives, the superior results and ease of use make them a worthwhile investment. We highly recommend CND color pigments for achieving professional-quality acrylic enhancements.
Q&A: Expert Answers to Your CND Additive Questions
Here are some frequently asked questions about using CND additives with acrylic:
1. **Can I mix different CND additives together?**
Yes, you can mix different CND additives together to create custom colors and effects. However, it’s important to test the mixture on a small scale before applying it to the entire nail to ensure compatibility and desired outcome.
2. **How do I prevent my acrylic from becoming too thick when using additives?**
To prevent the acrylic from becoming too thick, use a smaller amount of additive and adjust the liquid-to-powder ratio accordingly. You may need to use slightly more monomer liquid to compensate for the added volume of the additive.
3. **Can I use CND additives with other brands of acrylic powder?**
While CND additives are designed to work best with CND acrylic systems, they can often be used with other brands of acrylic powder. However, it’s important to test the compatibility of the products before applying them to the entire nail to ensure proper adhesion and prevent discoloration or lifting.
4. **How do I store CND additives to prevent them from clumping or drying out?**
Store CND additives in a cool, dry place away from direct sunlight. Keep the containers tightly sealed to prevent moisture from entering and causing clumping or drying out.
5. **What’s the best way to remove glitter from acrylic nails?**
Removing glitter from acrylic nails can be challenging. The best method is to file down the bulk of the acrylic and then soak the nails in acetone until the remaining acrylic and glitter dissolve. Be patient and avoid picking or prying at the glitter, as this can damage the natural nail.
6. **How can I create a marble effect using CND color pigments?**
To create a marble effect, apply small beads of different colored acrylics to the nail and then gently swirl them together using a thin brush or toothpick. Avoid over-blending the colors, as this can create a muddy effect. Practice on a sample nail before applying the technique to a client.
7. **What are the best CND additives for creating a 3D effect?**
For creating 3D effects, consider using CND sculpting powders in combination with colored acrylics. These powders have a thicker consistency, allowing you to create raised designs and textures.
8. **How do I prevent air bubbles from forming in my acrylic when using additives?**
To minimize air bubbles, ensure your brush is fully saturated with monomer liquid and gently pat the acrylic into place rather than brushing it. Avoid mixing the acrylic too vigorously, as this can trap air bubbles.
9. **What’s the best way to clean my acrylic brush after using it with additives?**
Clean your acrylic brush immediately after use with a brush cleaner specifically designed for acrylic brushes. This will prevent the acrylic from hardening and damaging the brush bristles.
10. **How do I choose the right glitter size for my acrylic design?**
The choice of glitter size depends on the desired effect. Fine glitters create a subtle shimmer, while chunky glitters create a more dramatic sparkle. Consider the overall design and the client’s preferences when selecting the glitter size.
Conclusion: Elevate Your Acrylic Nail Art with CND Additives
Mastering how to use CND additives with acrylic opens up a world of creative possibilities for nail technicians. By understanding the different types of additives, mastering the application techniques, and troubleshooting common issues, you can create stunning, personalized acrylic nail enhancements that will impress your clients and set you apart from the competition. The ability to customize colors, enhance durability, and experiment with different effects is invaluable in today’s competitive nail industry. Remember, continuous learning and experimentation are key to mastering the art of acrylic nail enhancements.
As you continue your journey of mastering acrylic nail art, consider exploring advanced techniques such as ombre blends, encapsulation, and 3D sculpting. These techniques, combined with the versatility of CND additives, will allow you to create truly unique and breathtaking designs.
Share your experiences with how to use cnd additives with acrylic in the comments below! We’d love to hear your tips, tricks, and creative ideas. Or explore our advanced guide to acrylic sculpting to further enhance your skills.
